Dirkpitt289
Seam Filler
This was only my second build after returning to the hobby. The kit is one of the most simplistic kits I've ever come across despite coming with some resin bits. But there is little if no, panel lines on this at all. Not raised and not recessed. Nothing.
The Subject

The History
The first production MiG-3 rolled off the assembly line on December 20th 1940. By March 1941, 10 of these aircraft were coming off the production line every day. It was not long before the type would see combat, claiming a pair of German Junkers Ju 86 reconnaissance aircraft even before the start of hostilities between Germany and the Soviet Union.
By the time of Operation Barbarossa, over 1,200 MiG-3s had been delivered.
Over the next two years of the MiG-3, several new changes made it into production, including up-gunning to UBS machine guns and ShVAK cannons.
Due to the conditions of battle with the German forces, the MiG-3 was forced into a low altitude and even a ground-attack role, but it was quickly found to be inferior, and withdrawn from this role. It was eventually used as a reconnaissance plane. Its high service ceiling of 44,291 ft and fast high altitude speed made well suited for such a role.
Even with the MiG-3's limitations, Aleksandr Pokryshkin, the second leading Soviet ace of WWII with 59 official victories, recorded most of those victories while flying the MiG-3.
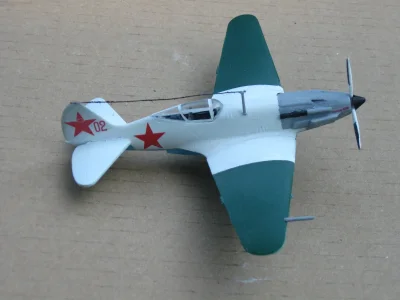
During the winter, many MiG-3's were painted white, both at the factory and on the field.
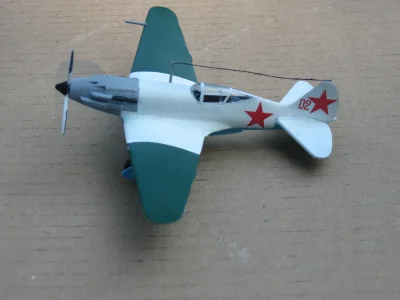
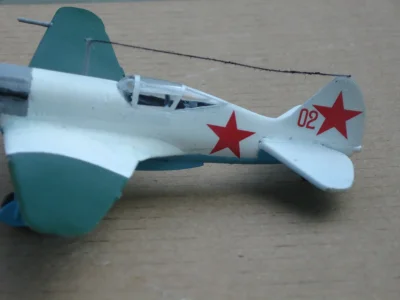
The white cote had a different look depending by the means of application (spray or brush), of the layer thickness, the wearing, the care etc. On many examples, it appeared as a very light grey instead that pure white. The white paint extends often on propeller spinner and blades, and even on the exhaust stacks. While summer camouflaged MiG-3s usually wore its numbers on the fuselage, in front of the stars, white MiG-3s wore them on the stabilizer, or don't have them at all. Very few exceptions to this rule were seen.
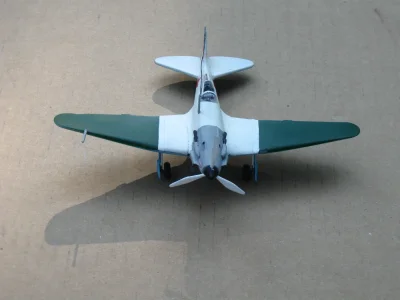
The subject I built is known as "Red 02." This aircraft was often interpreted as having red wing outer panels, silver engine cowling, red spinner and black number. This has been found to be false. The wings, are believed to be replacements from another aircraft due to the originals being damaged in combat and those aircraft were all green, none were red for obvious reasons.


I started with the Encore 1/72 scale kit. This is not an easy kit to work with. It requires a lot of filling and even more sanding. Not to mention it is lacking in detail.
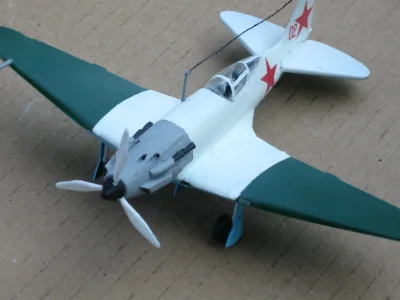
This build was plagued with problems from the beginning. It suffered from having its landing gear mysteriously broken off along with the right wing being cracked. During some painting I accidentally torn off one of the rear stabilizers while removing masking tape. This was my first attempt at working with resin which had its challenges. Another issue I had was the landing gear doors. They give you these really tiny flat pieces and expect you to bend them. I broke the doors on this kit and my spare kit. In the end I just scratch build flat doors.
As much as I liked this subject in the end I couldn't wait for it to be finished. In my first build I made a German captured P-51 and when it was completed it was had a very shiny finish. Not wanting to repeat the same mistake I learned of a product called "Flat Finish" by Polly Scale. I applied as I was instructed but now the plane looks chalky and some of the decals were affected with what looks like spiderwebs.
This was also my first attempt at attaching a radio wire. I took some thread from a pair of my GF's navy nylons. I cut out the vents on the leading edges, drilled out the gun ports and the pito tube.
At the time I had not learned how to weather so it is what it is. This is another of those builds I hope to redo at some point.
The Subject
The History
The first production MiG-3 rolled off the assembly line on December 20th 1940. By March 1941, 10 of these aircraft were coming off the production line every day. It was not long before the type would see combat, claiming a pair of German Junkers Ju 86 reconnaissance aircraft even before the start of hostilities between Germany and the Soviet Union.
By the time of Operation Barbarossa, over 1,200 MiG-3s had been delivered.
Over the next two years of the MiG-3, several new changes made it into production, including up-gunning to UBS machine guns and ShVAK cannons.
Due to the conditions of battle with the German forces, the MiG-3 was forced into a low altitude and even a ground-attack role, but it was quickly found to be inferior, and withdrawn from this role. It was eventually used as a reconnaissance plane. Its high service ceiling of 44,291 ft and fast high altitude speed made well suited for such a role.
Even with the MiG-3's limitations, Aleksandr Pokryshkin, the second leading Soviet ace of WWII with 59 official victories, recorded most of those victories while flying the MiG-3.
During the winter, many MiG-3's were painted white, both at the factory and on the field.
The white cote had a different look depending by the means of application (spray or brush), of the layer thickness, the wearing, the care etc. On many examples, it appeared as a very light grey instead that pure white. The white paint extends often on propeller spinner and blades, and even on the exhaust stacks. While summer camouflaged MiG-3s usually wore its numbers on the fuselage, in front of the stars, white MiG-3s wore them on the stabilizer, or don't have them at all. Very few exceptions to this rule were seen.
The subject I built is known as "Red 02." This aircraft was often interpreted as having red wing outer panels, silver engine cowling, red spinner and black number. This has been found to be false. The wings, are believed to be replacements from another aircraft due to the originals being damaged in combat and those aircraft were all green, none were red for obvious reasons.
I started with the Encore 1/72 scale kit. This is not an easy kit to work with. It requires a lot of filling and even more sanding. Not to mention it is lacking in detail.
This build was plagued with problems from the beginning. It suffered from having its landing gear mysteriously broken off along with the right wing being cracked. During some painting I accidentally torn off one of the rear stabilizers while removing masking tape. This was my first attempt at working with resin which had its challenges. Another issue I had was the landing gear doors. They give you these really tiny flat pieces and expect you to bend them. I broke the doors on this kit and my spare kit. In the end I just scratch build flat doors.
As much as I liked this subject in the end I couldn't wait for it to be finished. In my first build I made a German captured P-51 and when it was completed it was had a very shiny finish. Not wanting to repeat the same mistake I learned of a product called "Flat Finish" by Polly Scale. I applied as I was instructed but now the plane looks chalky and some of the decals were affected with what looks like spiderwebs.
This was also my first attempt at attaching a radio wire. I took some thread from a pair of my GF's navy nylons. I cut out the vents on the leading edges, drilled out the gun ports and the pito tube.
At the time I had not learned how to weather so it is what it is. This is another of those builds I hope to redo at some point.
Attachments
-
 9C561439.webp68.6 KB · Views: 0
 -
 30DF44B3.webp129 KB · Views: 0
 -
 35FEBCE6.webp126.7 KB · Views: 0
 -
 132D0CFA.webp114.8 KB · Views: 0
 -
 2630CF18.webp116.7 KB · Views: 0
 -
 A600939D.webp118.2 KB · Views: 0
 -
 E1AF370C.webp151 KB · Views: 0
 -
 Model Pictures 001.webp151 KB · Views: 0
 -
 Model Pictures 002.webp118.2 KB · Views: 0
 -
 Model Pictures 003.webp114.8 KB · Views: 0
 -
 Model Pictures 004.webp129 KB · Views: 0
 -
 Model Pictures 005.webp116.7 KB · Views: 0
 -
 Model Pictures 006.webp68.6 KB · Views: 0
 -
 Model Pictures 007.webp126.7 KB · Views: 0